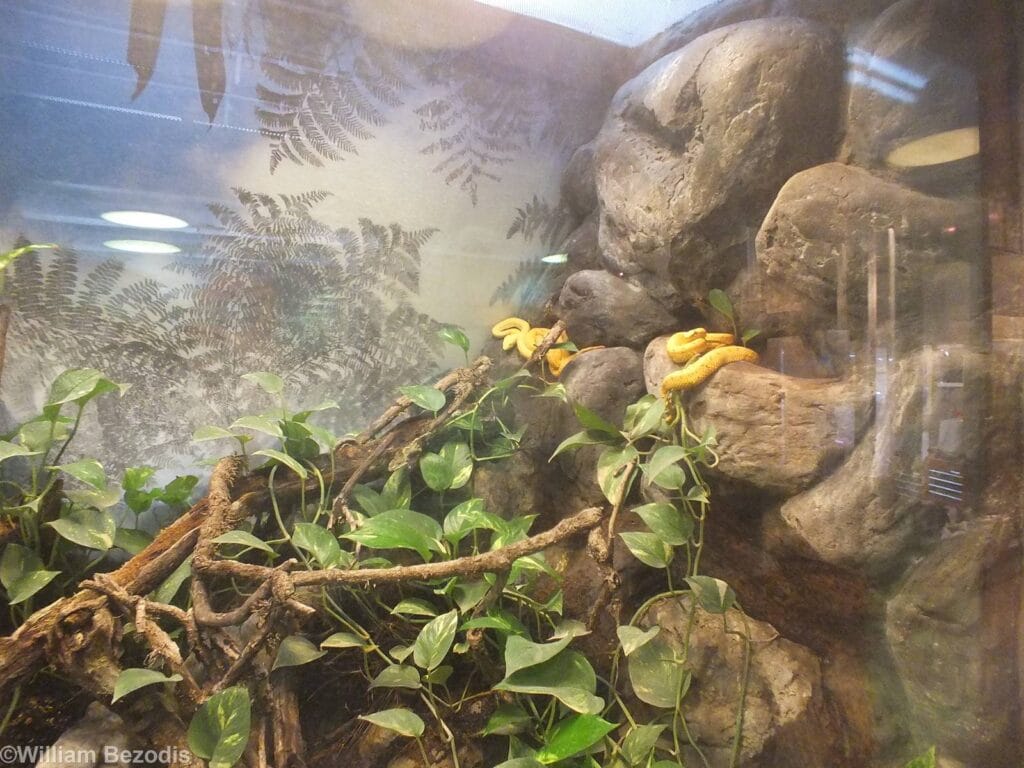
I killed every plant in my first bioactive enclosure.
Not on purpose. I just had no idea what I was doing. I picked plants that needed too much light, used the wrong substrate, and flooded the drainage layer within the first week. The enclosure turned into a swamp. The plants rotted. And my eyelash viper sat on the highest branch, looking down at me like I was the biggest idiot in the world.
I almost gave up on bioactive entirely. Almost.
But then I talked to some keepers who knew what they were doing. I rebuilt the enclosure from scratch. And a few weeks later, the plants were thriving, the clean-up crew was doing their job, and my eyelash viper was settling in like she’d lived there her whole life.
Now I run bioactive setups for all my arboreal vipers. The benefits are undeniable: better humidity, healthier plants, less frequent deep cleans, and a snake that actually displays natural behaviors. It’s not just an enclosure — it’s a slice of cloud forest in my living room.
If you’re thinking about going bioactive for your eyelash viper, this guide covers everything I’ve learned. The materials, the process, the mistakes, and the payoff.
What Is a Bioactive Vivarium?
A bioactive vivarium is a self-sustaining ecosystem. Unlike a traditional enclosure with fake plants and paper towels, a bioactive setup includes:
- Live plants that grow and help maintain humidity
- A clean-up crew (isopods, springtails) that break down waste
- A drainage layer that prevents the substrate from becoming waterlogged
- Beneficial microorganisms that process organic matter
The goal is to create a mini ecosystem where waste is broken down naturally, plants grow, and your eyelash viper thrives in conditions that mimic their natural habitat.
For arboreal snakes like eyelash vipers, bioactive enclosures are especially beneficial. These snakes come from cloud forests — damp, lush environments with constant biological activity. A bioactive vivarium replicates that environment better than any sterile setup ever could.
Why I Switched to Bioactive for My Eyelash Vipers
I was skeptical at first. Bioactive sounded complicated and expensive. I figured a simple setup with fake plants would work just fine.
I was wrong.
Here’s what changed my mind:
1. Humidity Stability
This is the biggest benefit for eyelash vipers. Bioactive substrates and live plants naturally regulate humidity. The soil retains moisture, the plants release water through transpiration, and the whole system acts like a buffer against dry air.
Since switching to bioactive, my eyelash viper humidity stays between 75-90% with minimal effort. I still mist regularly, but I don’t have to stress about it like I used to.
2. Natural Behaviors
In a sterile setup, eyelash vipers tend to sit in one spot all day. In a bioactive enclosure, they move around more — exploring branches, checking out new plant growth, occasionally soaking in the water bowl.
My Christmas Tree Eyelash Viper spends most of her time on her favorite branch, but I’ll catch her moving through the plants at night, hunting for any escaped clean-up crew members. It’s fascinating to watch.
3. Less Frequent Deep Cleans
In a traditional setup, you’re doing full substrate changes every month or two. In a bioactive vivarium, the clean-up crew handles the waste, and the substrate breaks down naturally. I do spot-cleanings and occasional leaf litter replenishment, but full teardowns are rare.
4. It Looks Incredible
Let’s be honest — part of the appeal is aesthetic. A well-planted bioactive enclosure with an eyelash viper perched on a branch is a living piece of art. It’s the kind of setup that makes visitors stop and stare.
Materials You’ll Need for an Eyelash Viper Bioactive Vivarium
Here’s everything I use when building a bioactive setup:
Enclosure
For an adult eyelash viper, I recommend an 18x18x24 inch tall enclosure at minimum. Height is critical — these are arboreal snakes that need vertical space.
PVC and glass both work. PVC holds humidity better, but glass gives you better visibility. Either way, make sure it has:
- Proper ventilation (screen top or side vents)
- Locking doors (non-negotiable for venomous snakes)
- Enough height for multiple perch levels
Drainage Layer
The drainage layer sits at the bottom of the enclosure and prevents the substrate from becoming waterlogged. I use hydroballs or lava rock, about 2-3 inches deep.
Substrate Barrier
A mesh barrier sits between the drainage layer and the substrate. It keeps soil from falling into the drainage layer while still allowing water to pass through.
Bioactive Substrate
This is the heart of the setup. I use a mix of:
- Coconut coir (moisture retention)
- Sphagnum moss (humidity and structure)
- Orchid bark (drainage and aeration)
- Leaf litter (food for clean-up crew)
- Charcoal (filtration and odor control)
You can buy pre-mixed bioactive substrates or make your own. I’ve done both — pre-mixed is easier, but making your own gives you more control.
Clean-Up Crew
This is the team that keeps your bioactive vivarium running. For eyelash viper enclosures, I use:
- Dwarf white isopods — they break down waste and decaying plant matter
- Tropical springtails — they eat mold, fungus, and microscopic organic matter
Add them before the snake. They need time to establish before they have to deal with snake waste.
Live Plants
Plants are essential for a bioactive eyelash viper vivarium. They provide cover, help maintain humidity, and look amazing.
My go-to plants for arboreal viper enclosures:
- Pothos — tough, fast-growing, great for climbing
- Bromeliads — perfect for high-humidity setups
- Ferns — love damp, shaded conditions
- Philodendrons — hardy and attractive
- Orchids — thrive in cloud forest conditions
Make sure all plants are reptile-safe and pesticide-free. I rinse mine thoroughly before planting.
Hardscape
Branches, cork bark, and vines provide climbing surfaces and visual interest. For arboreal vipers, hardscape is essential. I use:
- Ghostwood branches — sturdy and attractive
- Cork bark tubes — double as hides and climbing surfaces
- Jungle vines — flexible and natural-looking
Position branches horizontally at multiple heights so your viper can choose where to perch.
Lighting
Live plants need light. I use LED grow lights designed for vivariums. They provide the right spectrum for plant growth without overheating the enclosure.
Eyelash vipers don’t require UVB, but low-level UVB can benefit live plants and may support overall snake health. I use a low-output UVB bulb on a 12-hour cycle.
Misting System (Optional but Recommended)
Hand misting works, but a misting system makes life so much easier. It keeps humidity consistent and gives you one less thing to worry about. If you’re serious about a bioactive eyelash viper vivarium, invest in one.
Step-by-Step: Building My Eyelash Viper Bioactive Vivarium
Here’s exactly how I build a bioactive enclosure, step by step.
Step 1: Clean the Enclosure
Start with a clean, empty enclosure. Wipe down all surfaces with a reptile-safe disinfectant and let it dry completely.
Step 2: Add the Drainage Layer
Add 2-3 inches of hydroballs or lava rock to the bottom of the enclosure. This creates space for excess water to collect without saturating the substrate.
Step 3: Install the Substrate Barrier
Cut a piece of mesh barrier to fit over the drainage layer. Make sure it covers the entire surface area.
Step 4: Add the Bioactive Substrate
Pour your substrate mix over the barrier. For an 18x18x24 enclosure, I use about 4-6 inches of substrate. This gives plant roots room to grow and provides enough depth for the clean-up crew.
Step 5: Position the Hardscape
Place your branches, cork bark, and vines. I position mine so there are perches at multiple heights — one high branch for basking, one mid-level branch for ambushing, and some cork bark near the bottom for cover.
Make sure everything is secure. A falling branch could injure your snake.
Step 6: Plant the Live Plants
Plant your pothos, ferns, and other plants in the substrate. I arrange taller plants toward the back and shorter plants toward the front. This creates depth and gives your viper more cover.
Don’t overcrowd. Leave open space so you can see your snake for health checks.
Step 7: Add Leaf Litter and Clean-Up Crew
Scatter dried leaf litter over the substrate. This provides food for the clean-up crew and gives the enclosure a natural look.
Then introduce your isopods and springtails. I add them a few weeks before the snake so they can establish themselves.
Step 8: Install Lighting and Misting
Set up your LED grow lights on a 12-hour timer. If you’re using a misting system, install the nozzles and program the schedule.
I mist twice a day — once in the morning, once at night — for about 30 seconds each time.
Step 9: Let It Cycle
This is the step most people skip. Before adding your snake, let the enclosure cycle for at least 2-4 weeks. This gives plants time to establish, allows the clean-up crew to multiply, and lets the substrate settle.
During this time, monitor temperature and humidity daily. Make adjustments before your snake arrives.
Step 10: Introduce Your Eyelash Viper
Once the enclosure is stable and the clean-up crew is active, it’s time to add your viper. Use proper handling tools — a hook or shift box — and give them time to settle in.
Don’t feed for the first week. Let them acclimate to their new home.
Maintaining an Eyelash Viper Bioactive Vivarium
Bioactive doesn’t mean zero maintenance. Here’s my routine:
Daily
- Check temperature and humidity
- Mist (if not using a system)
- Spot-clean any visible waste
- Quick visual check on your snake
Weekly
- Refill water bowl
- Check plants for damage or die-off
- Add leaf litter if needed
- Wipe down glass for visibility
Monthly
- Trim overgrown plants
- Replace leaf litter
- Check clean-up crew population
- Deep clean water bowl
Every 6-12 Months
- Partial substrate refresh
- Clean or replace misting nozzles
- Check lighting and heating equipment
- Full enclosure inspection
The clean-up crew handles most of the waste, but you still need to monitor conditions and make adjustments. A bioactive vivarium is a living system — it changes over time.
Common Bioactive Mistakes I Made (So You Don’t Have To)
Mistake 1: Skipping the Drainage Layer
I thought I could get away without it. I was wrong. Without a drainage layer, the substrate becomes waterlogged, plants rot, and the whole system crashes.
Fix: Always use a drainage layer. It’s not optional.
Mistake 2: Using the Wrong Plants
I picked plants that needed too much light or too little humidity. They died within weeks.
Fix: Research plants before buying. Stick to species that thrive in high-humidity, low-light conditions.
Mistake 3: Adding the Snake Too Soon
I was impatient and added my viper before the enclosure had cycled. The plants hadn’t established, the clean-up crew was struggling, and the whole system was unstable.
Fix: Wait 2-4 weeks before adding your snake. Patience pays off.
Mistake 4: Not Enough Clean-Up Crew
I added a small culture of isopods and expected them to handle everything. They couldn’t keep up.
Fix: Start with a larger clean-up crew population. More is better than less.
Mistake 5: Overwatering
I misted too much, too often. The substrate became saturated, mold started growing, and the plants suffered.
Fix: Let the substrate dry slightly between mistings. You want damp, not soaked.
The Result: A Thriving Eyelash Viper Bioactive Vivarium
When everything comes together, a bioactive eyelash viper vivarium is incredible. The plants grow lush and green. The clean-up crew keeps everything clean. Humidity stays stable without constant effort. And your snake finally exhibits natural behaviors — exploring, hunting, and perching like they would in the wild.
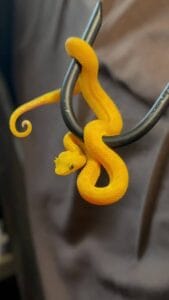
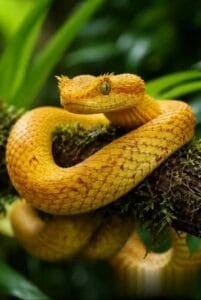
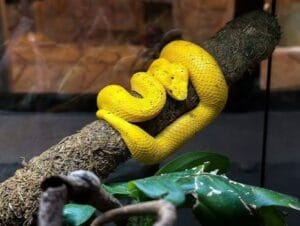
My Christmas Tree Eyelash Viper has been in her bioactive setup for two years now. She’s healthy, active, and absolutely stunning against the green backdrop of the plants. Her red and orange speckles pop against the foliage, and visitors always comment on how alive the whole enclosure feels.
It took some trial and error, but I’d never go back to a sterile setup.
Ready to Build Your Own Bioactive Vivarium?
The enclosure is the first step. The snake is the final piece.
Here’s what’s currently available at nightfallreptiles.com:
| Morph | Price | Status |
|---|---|---|
| Christmas Tree Eyelash Viper | $510 | Available |
| Golden Eyelash Viper | $510 | Available |
Both are captive bred, established on frozen-thawed prey, and shipping nationwide to legal states.
Christmas Tree Eyelash Viper – $510 – Captive Bred – Nightfall Reptiles
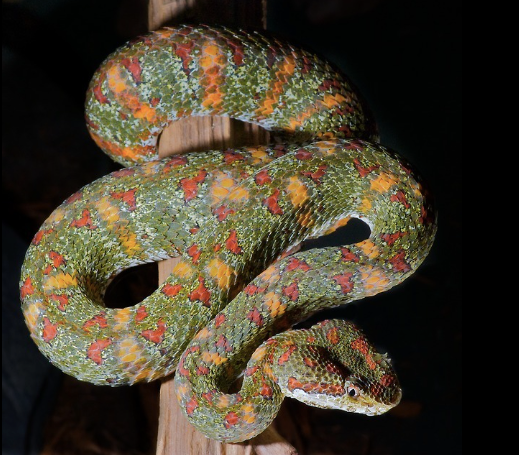
Christmas Tree Eyelash Viper For Sale
Bothriechis schlegeliiCaptive BredMale and Female AvailableApproximately 18 – 24 Inches In LengthAdults Will Grow To About 2 Feet In LengthFeeding On Frozen Thawed Or Live Adult Mice*These Are Venomous. Please Know Your State Laws Before Inquiring As Some States Require Venomous Permits*
100 in stock
Golden Eyelash Viper – $510 – Captive Bred – Nightfall Reptiles
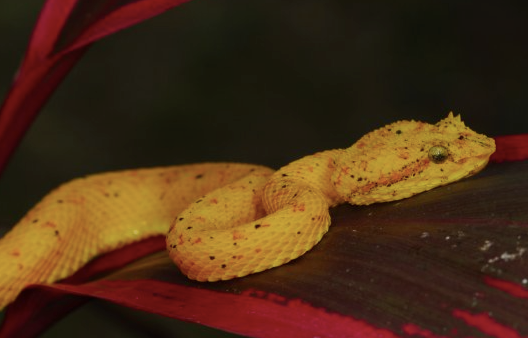
Golden Eyelash Viper For Sale
Bothriechis schlegeliiCaptive BredApproximately 18 – 24 Inches In LengthAdults Will Grow To About 2 Feet In LengthFeeding On Frozen Thawed Or Live Adult Mice*These Are Venomous. Please Know Your State Laws Before Inquiring As Some States Require Venomous Permits*
100 in stock
Build your bioactive vivarium, let it cycle, and then add one of these beauties as the centerpiece.
Got questions about setting up a bioactive enclosure for eyelash vipers? Drop a comment below or hit us up — I’m always down to talk vivariums and vipers.
FAQs
What is a bioactive vivarium for eyelash vipers?
A bioactive vivarium is a self-sustaining enclosure with live plants, a clean-up crew (isopods and springtails), and a drainage layer that mimics the snake’s natural cloud forest habitat.
Do eyelash vipers need a bioactive setup?
No, they can thrive in a well-maintained traditional setup. But bioactive enclosures offer better humidity stability, more natural behaviors, and less frequent deep cleans.
What size enclosure do I need for an eyelash viper bioactive vivarium?
I recommend at least 18x18x24 inches for an adult eyelash viper. Height is important — these are arboreal snakes.
What plants are safe for eyelash vipers?
Pothos, bromeliads, ferns, philodendrons, and orchids are all safe, high-humidity plants that work well in eyelash viper bioactive vivariums.
What clean-up crew do I need for an eyelash viper bioactive enclosure?
Dwarf white isopods and tropical springtails are the standard combo. They break down waste, eat mold, and keep the substrate healthy.
How long should a bioactive vivarium cycle before adding my snake?
I recommend 2-4 weeks minimum. This gives plants time to establish and the clean-up crew time to multiply.
Can I put my eyelash viper in a bioactive setup right away?
No. Let the enclosure cycle first. Adding a snake too soon can crash the system and stress your animal.
Disclaimer: This article is based on my personal experience with bioactive enclosures for eyelash vipers. It is not a substitute for professional veterinary advice. Always consult a qualified reptile veterinarian for health concerns. Venomous snake keeping is regulated in many areas — check your local laws before purchasing.